Create a Purchase Order from a Project
1. Open the project from the My Projects dashboard widget, the Utilities panel, or the Projects section of CINX.

2. If not done already, populate the project with the required items. See other support articles on adding items to a project via BOM Import or from the SEARCH.
3. Click the New PO Assign a PO Name and Number (if not auto-populated) and select the Vendor. NOTE: For information on connecting vendors, contact HPH – This email address is being protected from spambots. You need JavaScript enabled to view it..">This email address is being protected from spambots. You need JavaScript enabled to view it..
This email address is being protected from spambots. You need JavaScript enabled to view it..">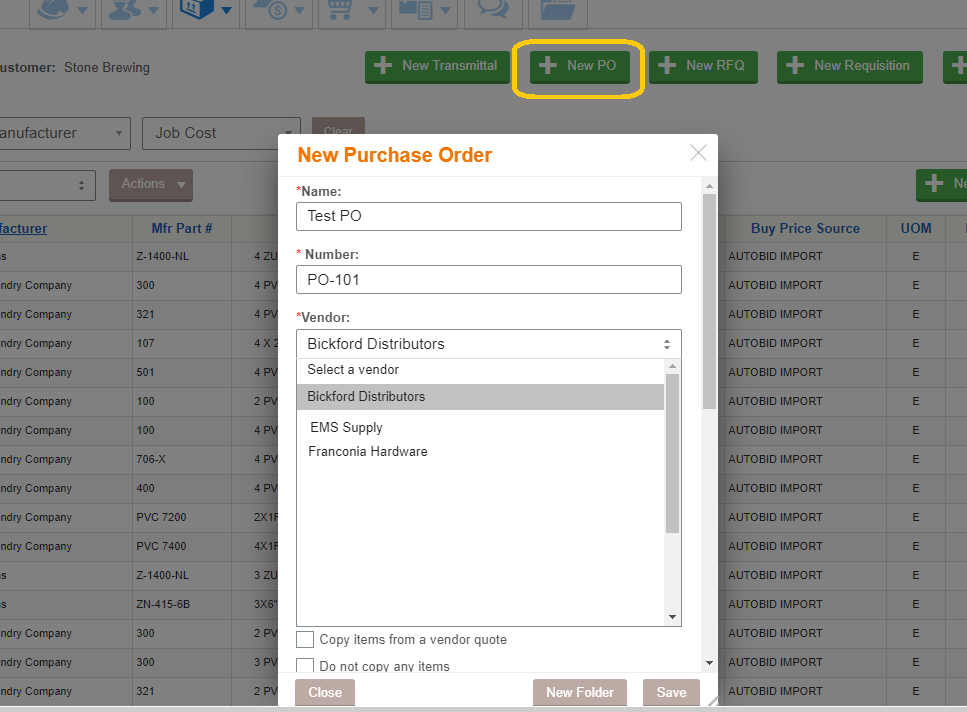
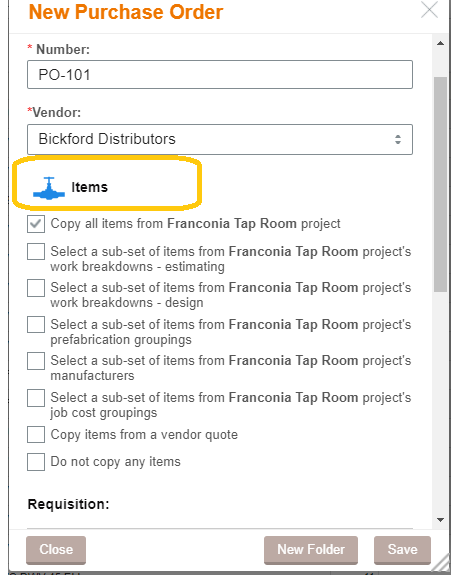
4. Next, select the items from the Project. You can select ALL items, or a work breakdown structure that has come in from your estimating/modeling system, of from an existing Requisition.
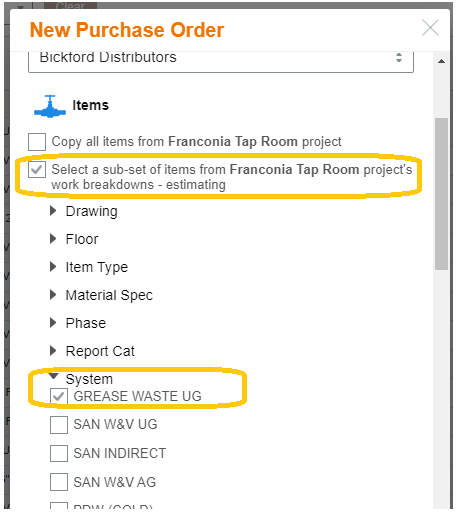
5. For this Purchase Order will use a system from the Work Break Down structure was imported from the estimating program:
6. Select (or create a folder) to save the PO and click Save.

7. The new Purchase Order will open!
- The main menu is across the top. You can hide the top portion of the PO by clicking the gray up error above the item grid.
- You can edit values by clicking in the cell. Switch Views to see different types of information.
- The ACTIONS button allows for bulk editing, printing and exporting the item grid.

8. As you move from the menu at the top, you can assign information or leave the fields blank.
9. On the VENDOR (forklift) menu, you can assign the sales representatives at your branch. They will receive an email notification when you submit the PO.
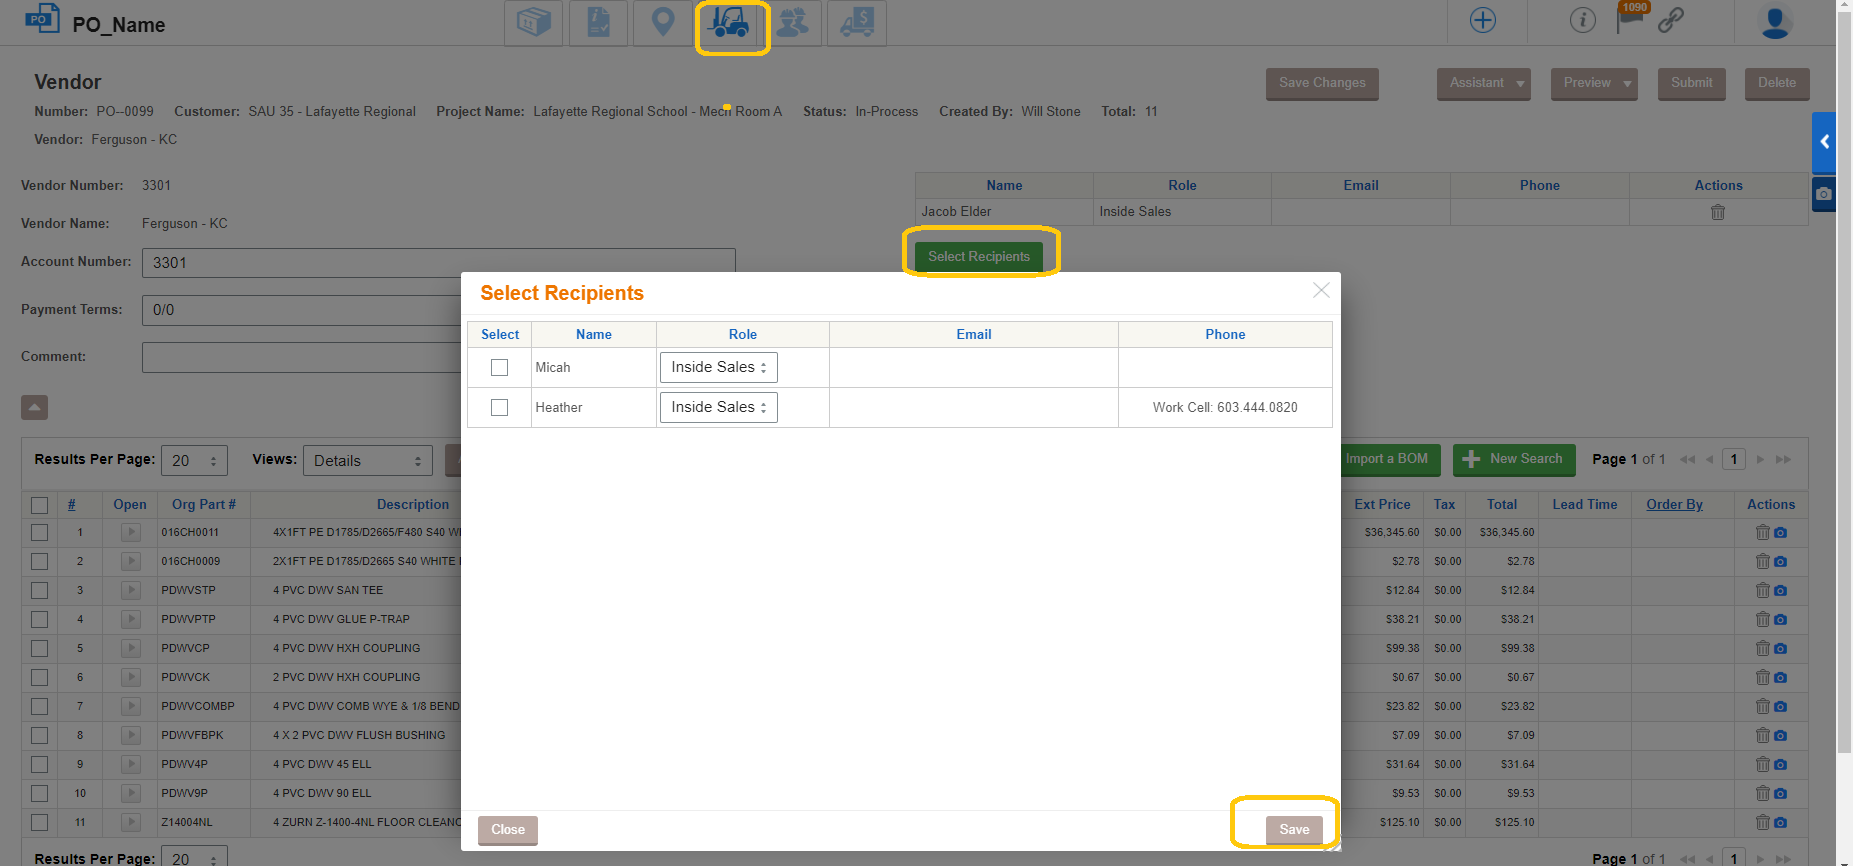
10. Do not forget to hit the Save Changes button whenever you make a change to the PO.
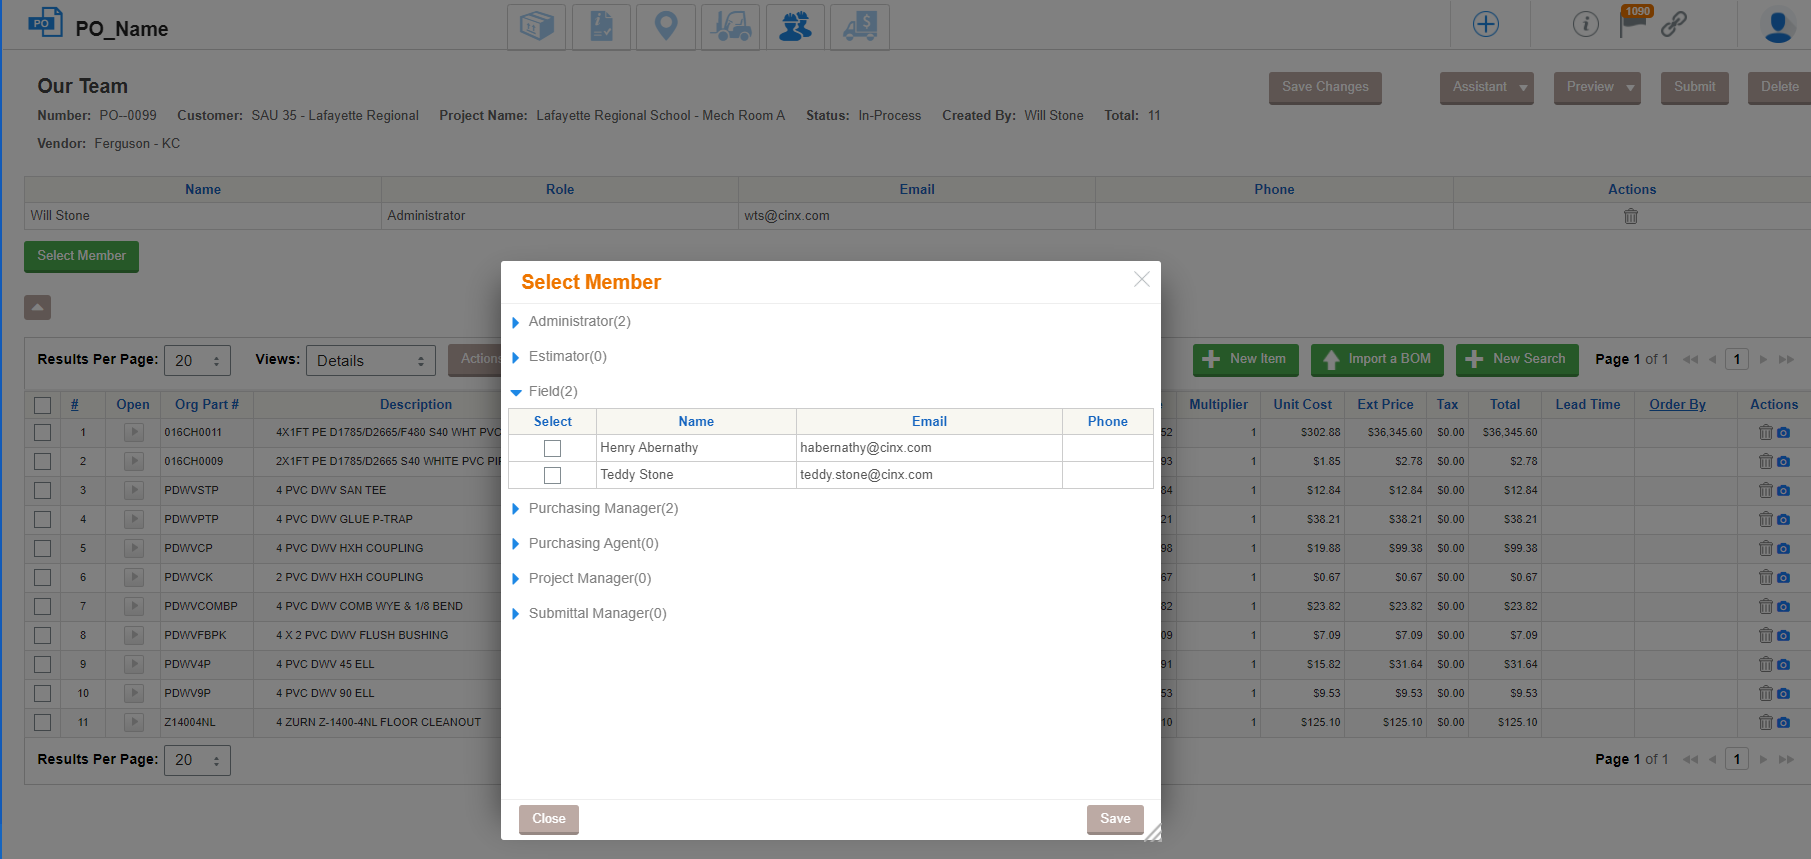
11. If you need to add other team members, you can click the Our Team menu option and check the appropriate team members. Team members you select will receive email notifications when the PO is submitted and accepted by the vendor.
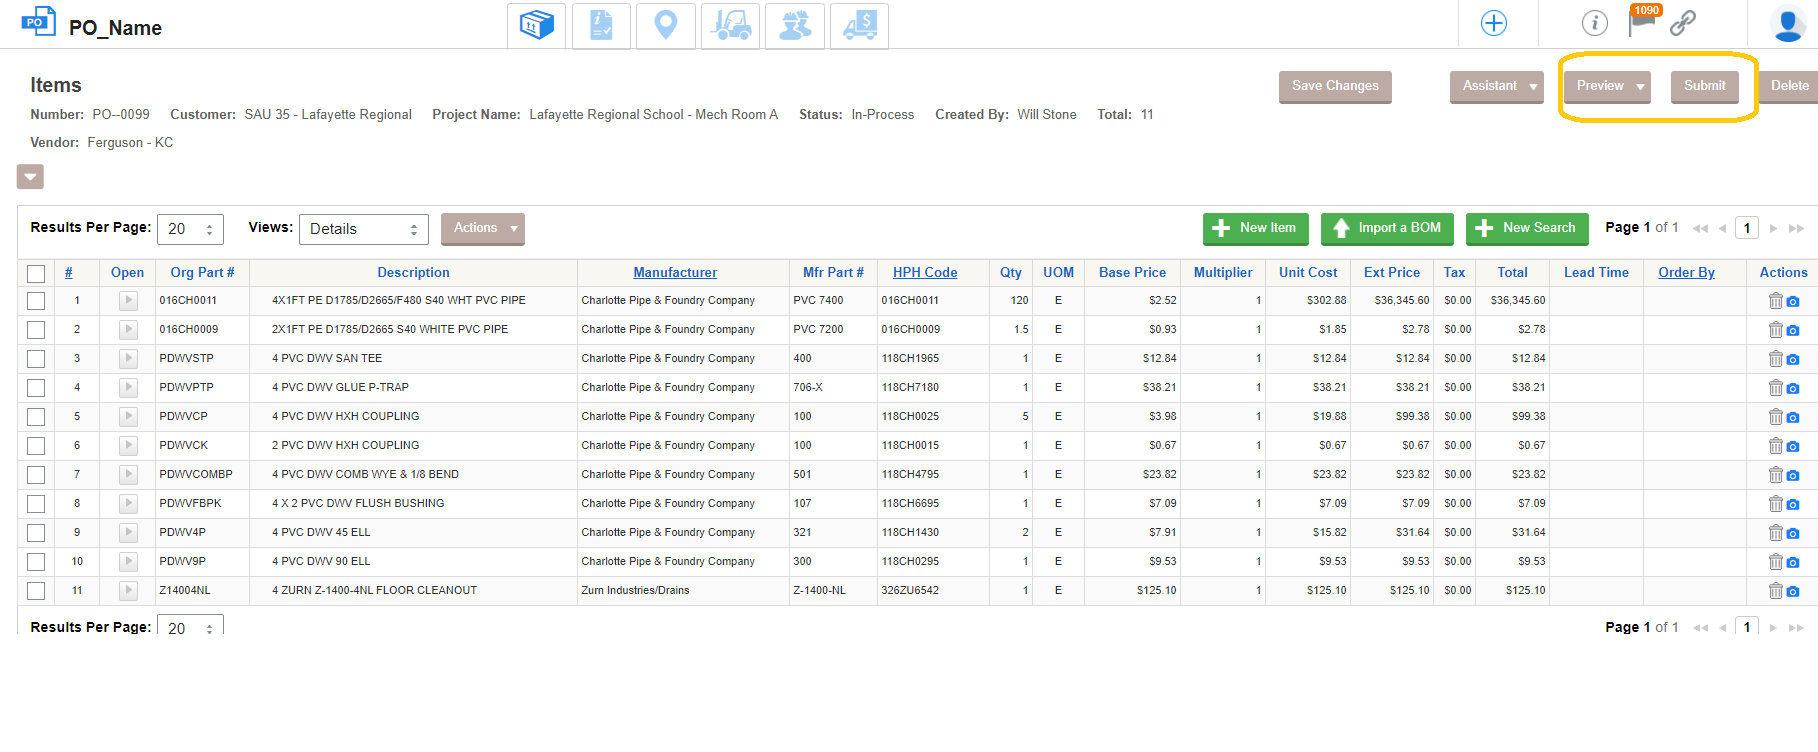
12. When you have completed populating the PO, you can Preview the PO or simply hit SUBMIT.
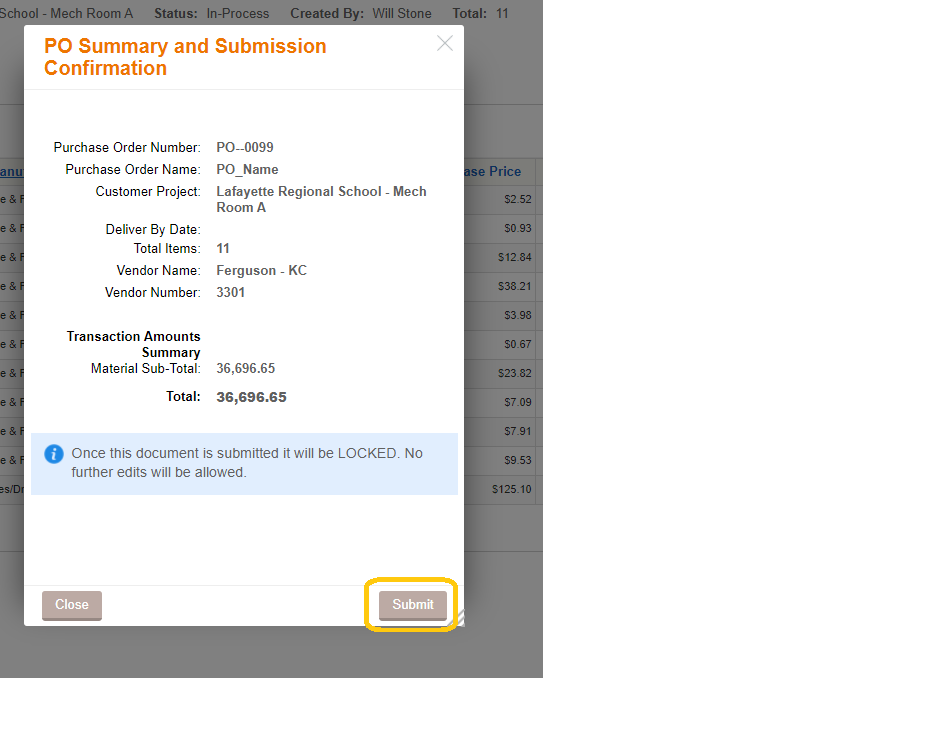
13. Once submit is clicked, you will receive a summary and one final time to review the information. Click submit one more time.
14. You, your team members, and the vendor sales staff selected will receive an email notification of the submitted PO along with pdf and excel versions of the purchase order for your reference.
- Tags: : Create, create PO, create PO from a project, create purchase order, PO, project, Purchase Order